-
Posts
159 -
Joined
-
Last visited
-
Days Won
3
Content Type
Profiles
Articles
TU Classifieds
Glossary
Website Links
Forums
Gallery
Store
Everything posted by DGagner
-
After almost a year of research and watching all the youtube recommendations available, I started making baits a few months ago in November. Then I spent money and dove in head first. At the time I made a webpage as part of my website that was a complete guide to what I had learned regarding materials and tools. It's more than just painting but the painting is in there and part of it. http://gagnerwebsite.com/Deceiver2/CrankBait.html And, I made a video of the stuff I had purchased and made to get the job done. It's here: One of the few things I changed was I now use UV resin to coat them instead of epoxy resin. But it was just for the convenience and cool factor. The epoxy worked just fine. Good luck and let me know if you have an questions.
-
BAB2AA0C-9B05-4F43-9667-1C2584C30F27.jpeg
DGagner commented on 208bait's gallery image in Best Homemade Hardbait
-
And if I had read his original post more carefully I would have seen that. Ah well..... if anyone is clear coating a bait the info is viable. But as far as this thread..... nevermind.
-
I made a half dozen hard baits this winter. My first time making them. Finally, ice out so I headed down to the dock to try them out for the first time... fingers crossed that I did at least something right. This is a video of their action.
-
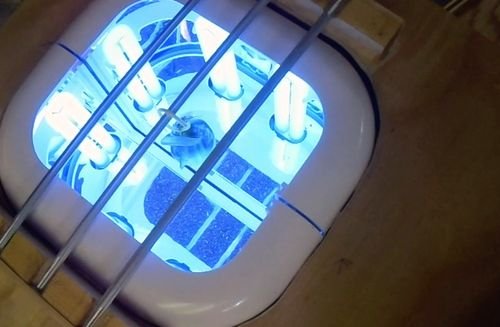
If you use the fingernail resin hardener lights, about $25 on amazon it works really good (get the bulb ones not the LED ones). I found it worked great and built a hardening tank using two of them. But one works just as good. Also, Alumi-uv is good but expensive and hard to get now. Look on Amazon for the Chinese knockoffs. They are identical. I've been using it for awhile now. It takes about 20 minutes to cure a bait. I just paint them on and keep the brush in a tin foil tube I made. If you keep it out of the light it won't get hard. On the bait the resin seems to self level and hardens smoothly without having to turn it like you have to do with epoxy. This is my hardening light setup with a bait hanging in it. You can see it being built here on youtube.
-
A solution for you..... Alumi-UV is the one I've used. But it's pretty pricy and they've been out of stock for a few months now. I'm not sure they'll be back. I don't know if you are using the UV type or not but they're great. I watched some videos by the "Engineered Angler" (look on youtube, he's pretty good) He uses UV resins and has tested the Chinese knockoffs and finds they and Alumilite are the same thing. A $20 alumi-uv bottle is $13 for the same sized China brand. I bought some and have used it for awhile now. It is the same and works great. I use a $25 fingernail hardener to cure them 20-30 minutes.
-
-
-

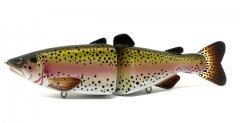
Tricks for painting small spots (trout pattern)
DGagner replied to Hillbilly voodoo's topic in Hard Baits
I am just about ready to 'dot' my first trout. This thread has come at just the right time. Thnx. -
This is what I do with no issues. Then again a 5 lb'er is the most I'd expect from my lake. 2-3 is more typical.
-
I've got the HP-CS but the one you chose is sort of new but is supposed to be very good with smaller stuff. It should be a very good choice. It is pretty expensive though. Anyway, it's an iwata , you can't go wrong. Let us know how it works!
-
Putting a mass in the belly isn't necessarily for floating/sinking properties although it sometimes is for that if you want one to sink. The lure has to float upright in order to wiggle right. This has to do with the shape of the lure also but if not weighted properly when it undulates in the water it will also roll from side to side too. Sometimes if it goes fast it will do a complete 360 rotation. For me the weight is to keep it upright.
-
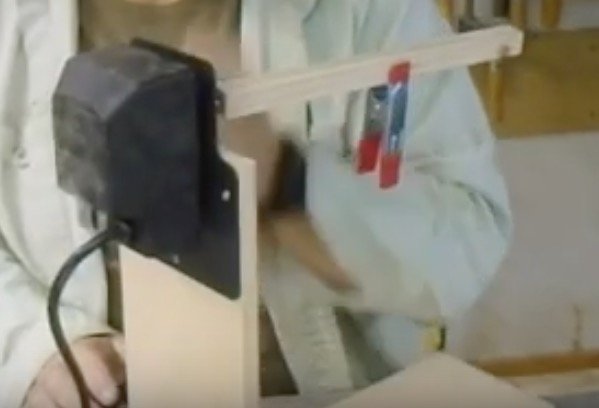
Look for a cup turner on Amazon. They look just like a rotisserie motor but has a short shaft permanently mounted on it so you can attach a wood dowel or square length of wood on it. See below, I just drilled a hole in the end of the wood and pressed it onto the square shaft. A two part stand made with two pieces of plywood and two screws. They cost about $25. Before I got UV resin I did lures with two part epoxy using this. The speed is just right and the thing will turn a turkey so don't worry about what you might want to turn for lures. Other features: Switch on the back of it, and it has a metal plate to screw it on wood instead of the cleats on rotisserie turners meant to snap onto the side of a bbq grill. A cup turner is used to put a foam mold on and put cups on it so when it is glazed it turns and dries evenly. It's an arts and crafts thing but works wonderfully for lures. Not inexpensive, but not that expensive either and with a small effort makes the lure turner setup quick and effective.
-
I'm also new to baitmaking. Are you confusing perpendicular with parallel? Perpendicular would be at right angle to the line. I have one lead weighted, billed, crankbait that tilts to one side a bit and if it does then the bill will steer it that way. I'm sure it's the lead inside the belly that must be a little off center. I have a choice. Live with it or re drill and try to rebalance the mass by re leading it. I will tell you that taking my mid body treble hook and bending the eye loop a little to one side so the hooks hang a little to the left might help balance the lure out in my case. Still ice here so can't try it yet. Not the most elegant solution but beats having to rework the lure right?
-
I seal the wood by simply dipping in sealer. After I do the white base I put a coating of UV resin on before I paint. A coat of another finish like two part epoxy, of whatever you put on as your final coat will be the same. I find that it smooooths out the lure, hides the imperfections, and is like painting over a nice clear smooth hard finish as if it were plastic. Of course I still put on my topcoat (Uv resin) when I'm done like usual. The added coating does give a little bit of weight to the the lure so add your ballast accordingly. Marling baits uses Polycrylic (an inexpensive minwax product from places like homedepot) after initial white paint. He dips it, it is acrylic based so it dries quickly and clear. I've not used it for lures but I have for furniture and it's nice stuff. A link to my channel that I simply use to upload builds of my lures for the fun of it that shows the process. Look for the lure with the 'roach' pattern to see what I just described.
-
Createx. I've never used lacquer based but might be interested. Then again I'm always completely or partially cleaning out my airbrush for the next color. Going to other solvents to thin and clean might be a deterrent for me.
-
I heat mine with a torch. I have a homemade leadpot. I've never had it scorch the wood. Didn't know it could.
-
I just pour them in the bait but it brings to mind when I was a kid. We used to make fishing weights by pouring lead into the groove of a tongue and groove boad, then cut them up.
-
I found this response from 2018 on a fly tying forum of someone asking the same question. ------------------ I have quite a few 28, 30, and 32. And I keep them under lock and key and 24 hour guard. I don't believe 30 and 32 are even being produced and haven't for a few years. You can still find 26 and 28 in a few places if you hunt but Mlandry has given you the best bet today for small hooks. https://www.tenkarab...idge-hooks.html ---------------------
-

Solarez Polyester UV Cure Grain Sealer/Filler Question
DGagner replied to Chonch12's topic in Hard Baits
I've began putting a topcoat of UV resin over the white primer coat on my baits. I used to use superglue the the white primer, or dipping in some sanding sealer then the white topcoat but that only sealed the wood. Now I've begun spreading a coat of UV resin over the white and putting it in my UV light chamber. All th imperfections get filled and I have a nice surface to paint on. I'd imagine another topcoat like yours or even epoxy topcoats would do the same thing One thing I found out though is that if I carve gills into the wood I have to exaggerate the depth of the carving as the coating seems to smooth it out just like it does the imperfections. If I don't carve deeply it's almost like I didn't carve much at all. I use an alumilite-UV or equivalent. I found that solarez, cures quickly but sometimes thickens up in the bottle just from opening and closing it and being exposed to ambient light. Other resins take about 30 minutes under uv light to harden so even a large bottle stays fairly fluid over time. -
I've been wanting to try this and will at some point. I watch youtube vids on it and they seem to manage. I'm finding it interesting that our baits are becoming little works of art, little resembling anything fish would normally think as food. But, we keep pushing the envelope on unusual schemes nevertheless. I'm very guilty of it.
-
I love this topic. I taught it to 7th graders for a few years. The metric system is cool in that it has standardizations you just can't do easily in the standard system. When talking about water: 1 gram = 1cm3 = 1 ml Water has a density of 1 gram per cubic centimeter. So a 1 cm cube block of water would mass at 1 gram. You can do a lot with this. There are two ways to make something float more. Make it bigger for it's weight, or make it lighter for it's size. Take a 50,000 ton block of steel. It sinks. Shape it into a battleship and it floats. It has nothing to do with the air in it. It's the size. The same block of steel, when made larger will float more in water. It's size has to get larger than it's weight (to put it roughly). If you have a lure that has a mass of 10 grams, and is 10 cm3 in volume, it won't float or sink in water. It will stay at the level it is put at. If you have a lure that has a mass of 10 grams and is 11 cm3 in volume, it will float in water. And sink if the numbers are reversed. Oil has a density less than 1 gram per cm3. So the same lure will sink in it. And of course oil, which seems denser because it appears thicker than water is actually lighter, oil floats on water. This principle causes submarines to work, weather to happen, plate tectonics to occur, computer chips to be made... and a myriad of other things. Things in this universe can be explained by some basic principles you can count on one hand. Density is one of them. Thanks for your indulgence. I retired awhile back but I still have the ability to get long winded in the sciences at the drop of a hat. Ask my kids.
-
Your success is the best compliment. Thanks and glad it's going to work for you. It's getting so that with the UV resin I can whip up a batch in no time at all now. Also... the main point is it's very, very satisfying. I just made some red ones for a sinister nait I just made. Video is here should you be interested. They eye part is in the middle'ish of the video.
-
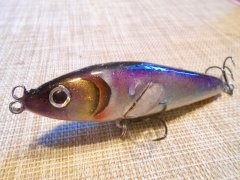
Wacky... for any Stargate fans. A bait loosely designed to be a goa'uld symbiote larva..... If you don't watch Stargate I highly recommend it. Usually on Amazon Prime or Netflx.




.jpg.611662fe249ed08d857bc2d596344ea8.jpg)
