Jump to content

Search the Community

Showing results for tags 'jointed lures'.

  • Search By Tags

    Type tags separated by commas.
  • Search By Author

Content Type


Forums

  • TU Club Forums
  • General Discussions
    • TU Site Info & Updates
    • The Docks
  • Public Tackle Making Forums
    • Hard Baits
    • Soft Plastics
    • Wire Baits
    • Fly tying
    • Rod & Reel building & repair
    • Boatbuilding
    • Homebrew Tools
    • Hybrid Tackle
  • The Bait Shop
    • Classified Ads
    • TU Advertiser Forum
  • Knowledge Base
    • Member Submitted Tutorials
  • TU Events and Contests
    • TU Events
    • TU Lure Swap
  • Web Tools
  • News Archive
    • General News

Product Groups

  • TU Premium Membership
  • Advertisements
  • TU Swag

Find results in...

Find results that contain...


Date Created

  • Start

    End


Last Updated

  • Start

    End


Filter by number of...

Joined

  • Start

    End


Group


AIM


MSN


Website URL


ICQ


Yahoo


Jabber


Skype


Location


Interests


Address


City


State/Province


Zip/Postal code


Country

Found 2 results

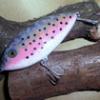
  1. Hey guys i am new on here and new to lure building and painting. I painted my first bait yesterday and it was a jointed swim bait. i made a lure turner but i dont think it will work for this bait. I will include a picture of the lure. Does anyone know how i should topcoat this lure?
  2. Hi there , folks , Just got up from the workshop having shot some pictures for another thread , .....since I'm just busy painting and topcoating another bunch of lures , I've thought that following pictures might be of interest for one or another fellow carver in here . This is a simply made frame , that I'm using to fix jointed lureblanks for painting and topcoating , .......it is important to stretch out the jointed lure real firm . If rubber bands should be too weak for bigger and heavier lures , one can also tie a simple loop of some kinda rigid twine or cord and utilize a kinked nail to twist the twine loop up to apply highest possible tension , .......the nail is then bound and secured against the dowel or one of the two long woodscrews somehow making it impossible to untwist again . Since the the timber dowel is quite narrow , one can easily access all spots with a brush , even turn the bait around a bit putting one finger on the belly hook eye . I'm painting my baits with a handbrush and modelmaking enamels , for topcoating I'm using a fast curing epoxy with only about 20 mins processing time , ......this way I do not need a rotisserie to avoid dripping , but only have to switch the bait around a few times whilst the epoxy starts to set . For the lure to dry I'd clamp the frame dowel in my vise or utilize spring-loaded or carpenter's clamps fixed on the ends of the wooden dowel to serve as a stand . But I'm sure , that it would be possible to design a rotisserie to accommodate such simple frames as well . Impossible to avoid clogging up the joining eyes with epoxy topcoat , ......after the final coat has cured , I would utilize my Dremel with a 1,0mm drill bit and a tiny cylindrical router bit to cut the eyes free very carefully , ....a finacky task , but it always worked out for me , ........the blade point of my old carpet knife with interchangeable blades takes care of the rest of glue remainders . Greetz , diemai
×
×
  • Create New...
Top