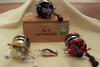
oldschoolbasser Posted June 16, 2008 Report Share Posted June 16, 2008 A few of my fellow members expressed interest in up-grading their Ambassadeur reels,so I rebuilt 1 of my reels and took pictures of the process.I will do my best to give you a step-by-step narrative of what I've done and hope the pictures help you in the process.Step (1) Un-screw the thumbscrews on the right side of the reel.Lift the side plate of the frame(do it vertically so the brake blocks on the spool don't fall out).(2) Remove spool from frame.(3)remove screws from left side plate.lift side plate from frame. Quote Link to comment Share on other sites More sharing options...
oldschoolbasser Posted June 16, 2008 Author Report Share Posted June 16, 2008 Step(4) remove collar that holds levelwind gear to the left side of the frame.(5)Un-screw nut on the bottom of the line guide(the pawl should fall out,but if it doesn't tap the frame on your hand and it should fall out.If it still doesn't fall out,pull the worm gear out and it will fall out.(6)Pull worm gear cover out from the frame. Quote Link to comment Share on other sites More sharing options...
oldschoolbasser Posted June 16, 2008 Author Report Share Posted June 16, 2008 Step (7)Un-screw the retainer plate screw(8)Remove handle nut(9)Remove C-clip from driveshaft using a small screwdriver.Insert the screwdriver in the gap between the clip and driveshaft and turn slowly until the clip comes loose.Keep your finger on the clip because it can fly off and you can lose it very easily. Quote Link to comment Share on other sites More sharing options...
oldschoolbasser Posted June 16, 2008 Author Report Share Posted June 16, 2008 (10)After removing the handle and spring plate below the handle(sorry forgot the pictures) ,remove star wheel.(11)Remove plate screws(12) lift side plate off being careful to lift it straight up off the brake plate(sometimes the washers come up with it. Quote Link to comment Share on other sites More sharing options...
oldschoolbasser Posted June 16, 2008 Author Report Share Posted June 16, 2008 (13) Remove cap from left side plate (14)Pull the spool centering bearing out.(15)Turn side plate over and push the bearing out gently with a wide enough screw driver that gives even pressure across the bearing.Repeat process on the right side plate.The right plate has a bearing cushion,and not a centering bearing.There's a little gap in which you can insert a small screwdriver and lift it out.Turn the plate over and remove the bearing.I didn't remove the cog wheel from the left side plate because I didn't have the new one on hand to do the up-grade,but all you have to do is un-screw it and lift the cog wheel off. Quote Link to comment Share on other sites More sharing options...
oldschoolbasser Posted June 16, 2008 Author Report Share Posted June 16, 2008 (16) Pull the anti-reverse dog away from the click wheel(17)Pull the drive shaft up off the post (18) remove shaft washer at the base of the shaft.Sometimes the washer will stick to the bottom of the driveshaft so be careful not to lose it because it will affect the performance of your reel. Quote Link to comment Share on other sites More sharing options...
oldschoolbasser Posted June 16, 2008 Author Report Share Posted June 16, 2008 (edited) (16) Pull the anti-reverse dog away from the click wheel(17)Pull the drive shaft up off the post (18) remove shaft washer at the base of the shaft.Sometimes the washer will stick to the bottom of the driveshaft so be careful not to lose it because it will affect the performance of your reel.Sorry I screwed up the sequence on the pictures.This picture shows what should be done before you pull the driveshaft off.The 1st picture in the previous set shows me pulling off the washers from the drive shaft,which you can also do before removing the driveshaft.The order of the washers is also important.From the bottom up they should be as follows.Curved tension washer,chrome flat washer,brass washer,and black shaft bearing. Edited June 16, 2008 by oldschoolbasser Quote Link to comment Share on other sites More sharing options...
oldschoolbasser Posted June 16, 2008 Author Report Share Posted June 16, 2008 (edited) (18)Pull the drive gear and spring plate off the drive shaft(19)Take the spring plate off the drive gear(20)remove the black shaft washer.Sometimes the washer sticks to the bottom of the gear,so just remove it.(21)Remove pinion gear from the arm holding it.To do this lift the pinion gear up.Stick your finger under the arm to keep it up,and pull the gear straight out.Make a note of the pinion gear as you want the open side facing the inside of the brake plate. Edited June 16, 2008 by oldschoolbasser Quote Link to comment Share on other sites More sharing options...
oldschoolbasser Posted June 16, 2008 Author Report Share Posted June 16, 2008 (edited) (22)pull the pressure plate off the drive gear(23)remove the old drag washer from the drive gear.Now you're ready to rebuild your reel with the new parts.I am putting all new gears,drag washers,bearings, drive shaft,bearing supported worm gear,pawl,and worm gear cover.You don't have to go to this extreme,but since I have built this reel from spare parts I already had,and this will be my primary fishing reels,I wanted it to be as good as I can make it. Edited June 16, 2008 by oldschoolbasser Quote Link to comment Share on other sites More sharing options...
oldschoolbasser Posted June 16, 2008 Author Report Share Posted June 16, 2008 (24)Now you're ready to put the reel back together with the up-graded parts.I usually clean the brake plate and re-lube it before I put everything back on.I use a toothbrush and rubbing alcohol to clean it,and then wipe it dry with a paper towel.I also use Q-tips to get under the parts I can't get my fingers under.I only put oil along the chrome arms of the brake plates,and not gear grease.(25)To remove the anti-reverse dog you need to push in the free-spool button slightly until it moves away from the shaft where the dog sits.(26)I use Carbontex Drag washers.the Kit comes with a drag,and base washer(which is the smaller of the 2).Place the smaller washer on the driveshaft,and push it down all the way. Quote Link to comment Share on other sites More sharing options...
oldschoolbasser Posted June 16, 2008 Author Report Share Posted June 16, 2008 (27)Place the new drag washer in the drive gear making sure it is flush ,and flat.(28)put the pressure plate back on top of the gear.(29)put them back on the driveshaft.I don't put grease on the Carbontex washers,but that is my personal preference. Quote Link to comment Share on other sites More sharing options...
oldschoolbasser Posted June 16, 2008 Author Report Share Posted June 16, 2008 (30)Put the new pinion gear back in the arm with the open end facing in.I put a drop of oil in the center of the gear where the brass is exposed.Make sure the ends of the arm go into the grooves in the plastic housing ,that keeps the gear in proper alignment.(31)Put the anti-reverse dog back on it's post the same direction you took it off.Put a drop of oil on the post first.(33)Put the driveshaft back on,after putting a few drops of oil on the post. Quote Link to comment Share on other sites More sharing options...
oldschoolbasser Posted June 16, 2008 Author Report Share Posted June 16, 2008 (34)Now you have to put the teeth of the driveshaft between the arms of the anti-reverse dog.if it doesn't have enough of an opening ,use a little screwdriver to open the arms,and then push the dog all the way in over the teeth.(35)Place all the washers back on the driveshaft in the same order you they were in.Curved spring washer first,then the chrome,followed by the brass one,then the black shaft bearing.(36)Now it's time to put the new bearings in the side plates.just reverse the process of taking them out,making sure they are all the way down in the housing.Sometimes the newer bearings are a little bit hard to get in.You can sand the outer housing with sandpaper to make them fit better.Sand them until you can push them in without having to use too much pressure,and make sure the go all the way down.Put the cushion back on top of the right side bearing and put the end cap back on tightening it all the way down.Repeat the process on the left side bearing ,putting the centering bearing back on,then putting the cap back on,but only tightening it half way . Quote Link to comment Share on other sites More sharing options...
oldschoolbasser Posted June 16, 2008 Author Report Share Posted June 16, 2008 (37)Now it's time to put the side plates back on.Starting with the right side,put the side plate over the brake plate,pushing it down all the way,and lining up the screw holes.If the plate doesn't go all the way down,press the free-spool button slightly with one hand while you hold the side plate and brake plate together with your other hand until the side plate goes all the way down.(38)put the side plate screws back in,and tighten them downuntil they are moderately tight.(39)Put the star wheel back on the driveshaft ,making sure it goes on straight. Quote Link to comment Share on other sites More sharing options...
oldschoolbasser Posted June 16, 2008 Author Report Share Posted June 16, 2008 (40)Put the spring washer on the driveshaft.(41) Put the handle on the driveshaft(42)Put the C-clip back on the driveshaft.You can do this by pushing it on with your finger. Quote Link to comment Share on other sites More sharing options...
oldschoolbasser Posted June 16, 2008 Author Report Share Posted June 16, 2008 (43) Put handle nut back on making sure it's on straight,then tightening it with your finger until you can't tighten it anymore.(44)Put the locking plate over the nut and tighten with the wrench until there is moderate resistance,making sure the plate,and handle holes line up.(45)Put plate screw back in. Quote Link to comment Share on other sites More sharing options...
oldschoolbasser Posted June 16, 2008 Author Report Share Posted June 16, 2008 (edited) (46)Now it's time for the levelwind replacement.First you need to insert the bearing into the levelwind cover.It goes in the end with the cut opening.Push the bearing in all the way until it is completely in the tube.(47)Put a drop of oil in the worm gear bearing(48)Then insert the worm gear in the tube until it goes into the bearing with a click. Edited June 16, 2008 by oldschoolbasser Quote Link to comment Share on other sites More sharing options...
oldschoolbasser Posted June 16, 2008 Author Report Share Posted June 16, 2008 (49)Now slide the tube through the frame,with the cut end going from right to left,stopping less than half way.Then put the line guide over the tube.Make sure the top of the line guide is in the groove above in the frame bar.(50)Push the tube all the way through until it snaps into place.The open part of the tube should be facing down,and the 2 longer ends of the tube should be on top and on the bottom.(51)put the retaining plate back on the levelwind gear to your right. Quote Link to comment Share on other sites More sharing options...
oldschoolbasser Posted June 16, 2008 Author Report Share Posted June 16, 2008 (52)Remove the cog wheel from the left side plate,and put a drop of oil on the post.Put the cog wheel back on and tighten moderately.(53)Put a drop of oil in the bearing.(54)Put a drop of oil on the end worm gear bearing(55)Put the right side plate back on(56)Put the spool shaft end inside the pinion gear,then slide the side plate down until it is flush with the frame.If there is some resistance,make sure the brake blocks on the spool are to the center of the spool as far as possible.If there is still some resistance give the handle a turn while pushing down gently until the side plate is flush.tighten thumb screws as much as you can with your fingers,then tighten 1/2 turn with a screwdriver. Quote Link to comment Share on other sites More sharing options...
oldschoolbasser Posted June 16, 2008 Author Report Share Posted June 16, 2008 This is how the brake blocks should be positioned.Sorry the pictures are out of order! Quote Link to comment Share on other sites More sharing options...
oldschoolbasser Posted June 16, 2008 Author Report Share Posted June 16, 2008 Now your reel is completely up-graded(with the exception of the bearing supported cog wheel).Your reel should perform a lot better with these up-grades,I know mine does.I will be listing the part #'s for the Ambassadeur parts I used for this rebuild another time.I've been at this posting for 4 hours now,and I need some sleep.Here's a few pictures of my finished reel.You'll notice I put a different handle on than the one shown.I put it on after I finished taking pictures.If you have any questions let me know,and I'll be happy to answer them.I should have posted this in the How To section,but by the time I realized I was in the wrong place I was half way done,and I type to slow to start over.I hope I have been helpful to those who wanted to up-grade their reels.Tight Lines Oldschool! Quote Link to comment Share on other sites More sharing options...
oldschoolbasser Posted June 16, 2008 Author Report Share Posted June 16, 2008 Last night I was so tired that I forgot to replace the pawl,and put the line guide nut back on.SORRY!!! Anyway here's how to do it.Insert the pawl with the ends facing in,and out of the frame,and not side to side.Place your finger on the pawl,and with gentle pressure push down until it stops.Next turn the worm gear until the line guide starts to move meaning the pawl is now lined up correctly.Put the nut back on the line guide,and tighten moderately.Put a few drops of oil on the worm gear,and you're done. Quote Link to comment Share on other sites More sharing options...
Spike-A-Pike Posted June 17, 2008 Report Share Posted June 17, 2008 oldschool. I know how tough it is to put together a tutorial of this size and complexity. I think you did a fantastic job and anyone wondering what it takes to get into and modify a bait casting reel will get a pretty good idea. With your permission, I'd like to convert your thread into a Member Submitted Tutorial and add it to the TU knowledge base. I was watching early this morning while posted it and I could see you getting tired as you where putting it up; JOB WELL DONE!!!!!!!!! Quote Link to comment Share on other sites More sharing options...
oldschoolbasser Posted June 17, 2008 Author Report Share Posted June 17, 2008 oldschool.I know how tough it is to put together a tutorial of this size and complexity. I think you did a fantastic job and anyone wondering what it takes to get into and modify a bait casting reel will get a pretty good idea. With your permission, I'd like to convert your thread into a Member Submitted Tutorial and add it to the TU knowledge base. I was watching early this morning while posted it and I could see you getting tired as you where putting it up; JOB WELL DONE!!!!!!!!! Thanks Bruce,I really enjoyed doing it,and hope other members will benefit from it.I'm no expert,but years of trial and error,plus a few great teachers have helped me greatly with my hobby.Please post it where you think it would best serve its purpose.Thanks for your support and encouragement.This is why I enjoy this board more than the others. Quote Link to comment Share on other sites More sharing options...
KcDano Posted June 17, 2008 Report Share Posted June 17, 2008 (edited) Recently came across an hardly used ultra mag xl plus left hand wind. It was a little tight on the wind. Under closer examination the thrust washer on worm gear was bent, hammered flat, wind easy now. Know any tricks for these reels? Sorry about that post in the middle of your tutorial I had no idea you were going into that much detail. Maybe Bruce can move it. Edited June 17, 2008 by Spike-A-Pike Move per request Quote Link to comment Share on other sites More sharing options...