Jump to content
Reelentless

Just About To Finish My First Hand Made Crank Bait And Have A Question About Posting Pictures

Recommended Posts

Took some pictures in each step I took and wanted to post it to get some feedback from you more experienced builders.Wanted to share some things I learned along the way as well. Not quite finished yet.Still needs the topcoat hooks and a swim test but wanted to find out what's the easiest way to post multiple pics.Success or fail I wanted to share my experience. I hope it swims

Link to comment
Share on other sites

Thanks for the help. I did have a photobucket account but looks like the appropriate way is to go through the gallery. Rules are rules.. I don't want to bog the gallery down. Even took a small video of my high tech bathtub swim test.:-) It's been covered a hundred times before but wanted to contribute to the site my experience. Every post on here has been covered sometime in the past but going through the search function can be a daunting task ...I always get side tracked..lol. It's definately not a "How to" post but it worked for me.

Edited by Reelentless
Link to comment
Share on other sites

Reelentless - The way I read the rules, is that if the images are relevant to the discussion, then they go in the post. You intend to post a series of the build and discuss it. Like you say, it would clog up the gallery, which is for finished lures for everyone to admire.


Just don't post them and ask for feedback. Write about what you learned, give opinions, new ideas, short cuts, techniques etc.


Dave

Link to comment
Share on other sites

I have a question concerning Photobucket. When I choose the photo I want to show here which option do I use.

1. email & im

2. Direct

3. html

4. img


On some post the photo shows up and that is what I want. But on some post there is a link that leads to all my photobucket photo's. I don't know which option to us, or is there a better way. Musky Glenn

Link to comment
Share on other sites

Thanks for the help. I did have a photobucket account but looks like the appropriate way is to go through the gallery. Rules are rules.. I don't want to bog the gallery down. Even took a small video of my high tech bathtub swim test.:-) It's been covered a hundred times before but wanted to contribute to the site my experience. Every post on here has been covered sometime in the past but going through the search function can be a daunting task ...I always get side tracked..lol. It's definately not a "How to" post but it worked for me.


Dude, you have us all on pins and needles.  Post them somewhere so we can check them out.  Hahaha

Link to comment
Share on other sites

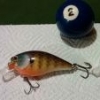
Here are some shots of the steps I took.They were all firsts as far as wire bending,ballast & sanding ect. Things I learned along the way. Make sure to drill the ballast hole before making the slit for the through wire.(Drill bit will catch on slit) Use finer sand paper and blow lure off between sandings because dust can pack into tiny imperfections that will show up during sealing. Keep lure marked for centering throughout the process. A lot of things were eyeballed which was nerve racking that I'll try to avoid next time. Lure swims great and has a nice slow rise when dead stopped. It is 2.5"s long and made of pine I had laying around that was 5/8's wide. Don't know how this post is going to turn out so Mods if it's screwed up or against the rules--please delete. I enjoyed the experience and I'm glad I quit being a chicken and jumped in...lol

lure1.jpg

lure2.jpg

lure3.jpg

lure4.jpg

lure5.jpg

lure6.jpg

lure7.jpg

lure8.jpg

lure9.jpg

lure10.jpg

lure11.jpg

lure12.jpg

lure13.jpg

lure14.jpg

lure15size.jpg

lure1.jpg

lure2.jpg

lure3.jpg

lure4.jpg

lure5.jpg

lure6.jpg

lure7.jpg

lure8.jpg

lure9.jpg

lure10.jpg

lure11.jpg

lure12.jpg

lure13.jpg

lure14.jpg

lure15size.jpg

lure1.jpg

lure2.jpg

lure3.jpg

lure4.jpg

lure5.jpg

lure6.jpg

lure7.jpg

lure8.jpg

lure9.jpg

lure10.jpg

lure11.jpg

lure12.jpg

lure13.jpg

lure14.jpg

lure15size.jpg

lure1.jpg

lure2.jpg

lure3.jpg

lure4.jpg

lure5.jpg

lure6.jpg

lure7.jpg

lure8.jpg

lure9.jpg

lure10.jpg

lure11.jpg

lure12.jpg

lure13.jpg

lure14.jpg

lure15size.jpg

lure1.jpg

lure2.jpg

lure3.jpg

lure4.jpg

lure5.jpg

lure6.jpg

lure7.jpg

lure8.jpg

lure9.jpg

lure10.jpg

lure11.jpg

lure12.jpg

lure13.jpg

lure14.jpg

lure15size.jpg

lure1.jpg

lure2.jpg

lure3.jpg

lure4.jpg

lure5.jpg

lure6.jpg

lure7.jpg

lure8.jpg

lure9.jpg

lure10.jpg

lure11.jpg

lure12.jpg

lure13.jpg

lure14.jpg

lure15size.jpg

lure1.jpg

lure2.jpg

lure3.jpg

lure4.jpg

lure5.jpg

lure6.jpg

lure7.jpg

lure8.jpg

lure9.jpg

lure10.jpg

lure11.jpg

lure12.jpg

lure13.jpg

lure14.jpg

lure15size.jpg

lure1.jpg

lure2.jpg

lure3.jpg

lure4.jpg

lure5.jpg

lure6.jpg

lure7.jpg

lure8.jpg

lure9.jpg

lure10.jpg

lure11.jpg

lure12.jpg

lure13.jpg

lure14.jpg

lure15size.jpg

post-45420-0-49355700-1391455491_thumb.jpg

post-45420-0-51182500-1391455492_thumb.jpg

post-45420-0-09100300-1391455493_thumb.jpg

post-45420-0-48583800-1391455494_thumb.jpg

post-45420-0-18857900-1391455495_thumb.jpg

post-45420-0-02426600-1391455496_thumb.jpg

post-45420-0-72435300-1391455496_thumb.jpg

post-45420-0-39884200-1391455497_thumb.jpg

post-45420-0-12145400-1391455498_thumb.jpg

post-45420-0-94314300-1391455498_thumb.jpg

post-45420-0-75686700-1391455516_thumb.jpg

post-45420-0-37781200-1391455517_thumb.jpg

post-45420-0-30779900-1391455518_thumb.jpg

post-45420-0-84136900-1391455518_thumb.jpg

post-45420-0-43040400-1391455519_thumb.jpg

Edited by Reelentless
  • Like 1
Link to comment
Share on other sites

Nathan, I did the through wire because the diy steps I was following called for it & I wanted the experience. Over kill yes. I had balsa but thought the scrap pine I had laying around would be more forgiving when I made sanding mistakes. I also had the wire and no screw eyes...lol

Edited by Reelentless
Link to comment
Share on other sites

How critical is the placement of the balast, was there a lot of trial and error. Musky Glenn

On this particular lure it was pretty much outlined for me. I just made sure it was centered and closer to the front belly. Being a crank I wanted it to sit head/lip down a little so it would start diving sooner. I'm sure it's a careful balance of placement & weight but it worked out well on this one.

Link to comment
Share on other sites

Thanks Vodkaman, We've got a foot of ice here so it's the best I could do. Love ice fishing but can't wait to break the boat out and chase some spring walleye. A trolling walleye crank is the next challenge. Should be alot of trial and error with that one but I look forward to it. I really enjoyed the whole process.

Link to comment
Share on other sites

Join the conversation

You can post now and register later. If you have an account, sign in now to post with your account.
Note: Your post will require moderator approval before it will be visible.

Guest
Reply to this topic...

×   Pasted as rich text.   Paste as plain text instead

  Only 75 emoji are allowed.

×   Your link has been automatically embedded.   Display as a link instead

×   Your previous content has been restored.   Clear editor

×   You cannot paste images directly. Upload or insert images from URL.

Loading...


×
×
  • Create New...
Top